Specifications
Optical path length: Typically 0.7- 5m
Accuracy: Application dependet
Repeatability: 2% of range (gas & application dependent)
Environmental conditions
Operating temperature: -20 ºC to +55 ºC (special version up to +65 ºC on request)
Storage temperature: -20 ºC to +55 ºC
Protection classification: IP66
Inputs / Outputs
Analog output (3): 4 – 20 mA current loop (concentration, transmission)
Digital output: TCP/IP, MODBUS,
Optional fibre optic
Relay output (3): High gas, Maintenance
Warning and Fault
Analog input (2): 4 – 20 mA process temperature and pressure reading
Ratings
Input power supply unit: 100 – 240 VAC, 50/60 Hz, 0.36 – 0.26 A
Output power supply unit: 24 VDC, 900 – 1000 mA
Input transmitter unit: 18 – 36 VDC, max. 20W
4 – 20 mA output: 500 Ohm max. isolated
Relay output: 1 A at 30 V DC/AC
Safety
Laser class: Class 1 according to IEC 60825-1
CE: Certified
EMC: Conformant with directive 2014/30/EU
Approvals
IECEx/ATEX zone 1: PENDING
Laser zone 1: PENDING
IECEx/ATEX zone 2: PENDING
Laser zone 0: PENDING
CSA: PENDING
Installation and Operation
Flange dimension alignment: DN50/PN10 or
ANSI 2’’/150lbs (other dimensions on request)
Alignment tolerances: Flanges parallel within 1.5°
Purge flow: Dry and oil-free pressurised air or nitrogen 10 – 50 l/min (application dependent)
Maintenance
Visual inspection: Recommended every 6 – 12 months
Calibration: Check recommended every 12 months
Validation: In-situ span check with internal cell
Dimension and weight
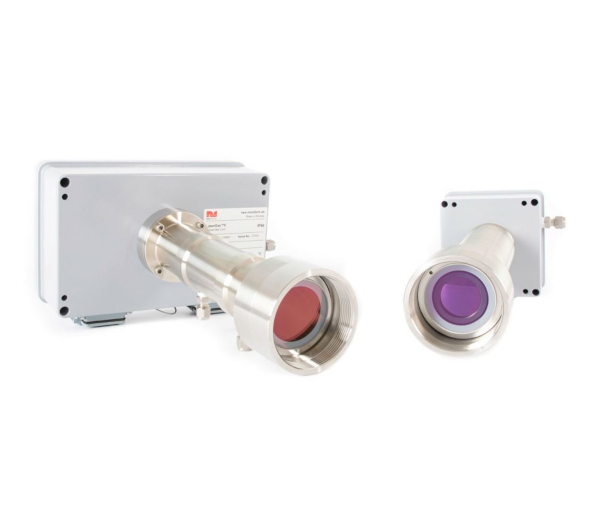
Transmitter unit: 405 mm (plus 65 for purge unit) x 270 mm x 170 mm, 6.2 kg
Transmitter unit: 405 mm (plus 65 for (Ex version) purge unit) x 270 mm x 310 mm, 7.9 kg
Receiver unit: 355 mm (plus 65 for purge unit) x 125 mm x 125 mm, 3.9 kg
Power supply unit: 180 x 85 x 70 mm, 1.6 kg


